Using Assignment-specific Requirements
In most cases, your clients are likely to have the same requirements
for a given shift each time. However there are always exceptions to any
rule. To accommodate this, you can set a client to enable the use of
these ‘on-the-fly skills’.
To do this, first go to the Client General Information or Client Locations sections by clicking on the ‘Clients’ button on the toolbar. This will bring you to the appropriate section.
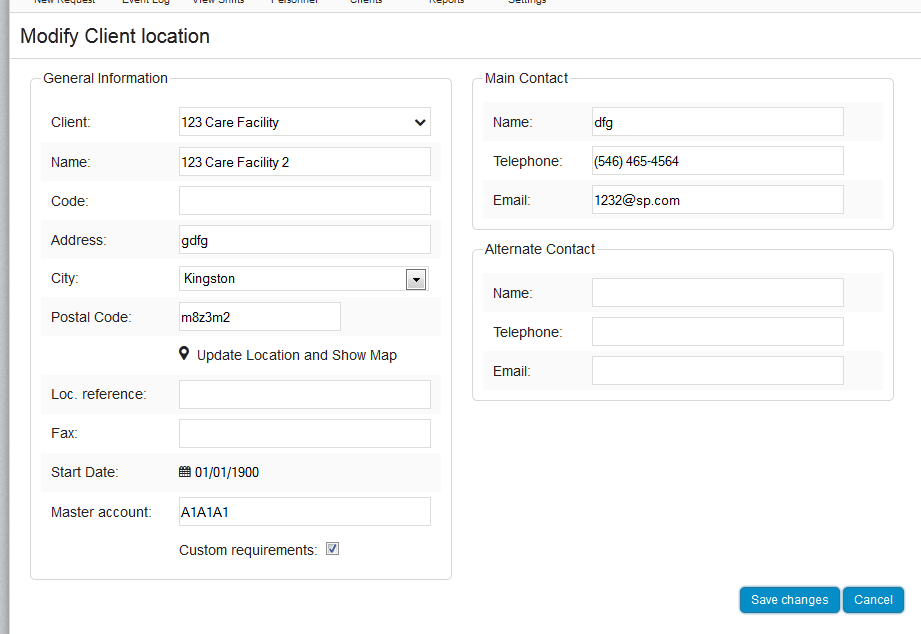
2. Note at the bottom left there’s a checkbox titled “Custom
requirements”. Filling this checkbox will enable that functionality -
for this location only.
3. Click the ‘Save changes’ button.
4. Go back to the New Assignment screen. You should notice a new option under the Client field - ‘Set Custom Requirements’.
Note: To see more info on qualifications, go to Qualifications management.

5. Click on ‘Set Custom Requirements’. This will bring up the qualifications picker. On the left are the current ‘standard’ requirements, and on the right is the list of Skillsets, Courses, and Languages that are available.
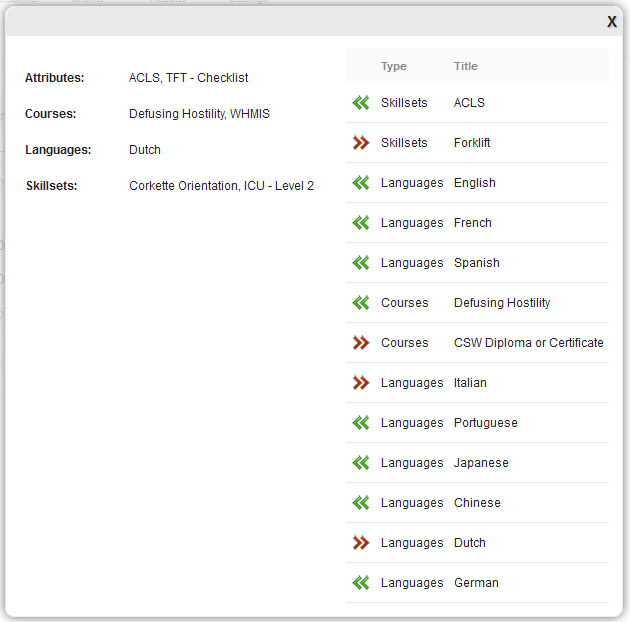
6. Click on a green arrow to add it to this assignment, or a red
one to remove it. Ones that are added will appear in the list on the
left. You can also remove standard requirements if they’re not
appropriate for this assignment. Click the X in the upper right corner
when you’re done to accept these choices.
7. Now, go back to the Scheduler by clicking on the View Shifts button on the tool bar, and select Week View.
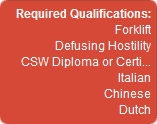
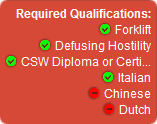
9. As you look through your list of personnel, you have two options: the ‘Qualified’ tab, which only lists people who meet all of the requirements, and the ‘Not Qualified’ tab, which lists only people who meet some or none of the requirements. In the second case, their skills will be matched against the requirements, and will be highlighted on the list. Ones they possess will include a green check mark, while qualifications they’re missing will be a red ‘no’ symbol.
10. From here, simply book your personnel as normal, and you’re done!